In the properties tag below choose the thickness as 3 as shown.

While pressing the Shift button draw a circle with width and height of 200 as shown

Click on the button encircled below to make 4 new layers and name them as actions, hour, min and sec. Your timeline shoul look like this.
Click OK and in the Properties tag set the name as sec_mc.

Go to “Window -> Library” and right click on sec_mc and click “Duplicate”. Name it as min_mc. Right click on min_mc and hit “Edit”. Select the line ad set its height in the properties tag as 75. Change the color.
Redo the above and name it as hour_mc with height 50 and a different color.
Click on the first frame of the min layer and drag min_mc on stage. Set the instance name as min_mc.
Click on the first frame of the hour layer and drag hour _mc on stage. Set the instance name as hour _mc.
Press Shift and select all three lines and in the Allign window click “Allign Bottom Edge ” and “Allign Horizontal Centre”. Drag all three to the centre of the circle drawn.
Right Click on the first frame of the actions layer and click “Actions”.
In the window that opens Copy and Paste the followin action script:-
var my_time:Date=new Date;
var hours, min, sec;
//get the present hour minute and second
hours=my_time.getHours();
sec=my_time.getSeconds();
min=my_time.getMinutes();
hours = hours + (min/60);
min=min*6 +(sec/60);
hours=hours*30;
sec=sec*6;
hour_mc._rotation = hours;
sec_mc._rotation = sec;
min_mc._rotation = min;
Right Click on the second frame of each Layer and click “Insert Frame”. Your final timeline should look like this :-
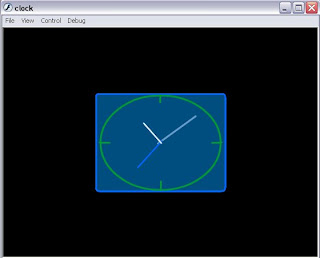
Done! Hit Ctrl+Enter to test what you have done.
Use your Imagination to change the background to make the clock look stylish.


