Sunday, July 26, 2009

Load Text From an External Text File using Action Script

There are two ways you can load data from an external text file:
1. You can load the whole text present in the file
2. Or you can format the text so that you can load in parts if you want to.

To Begin create a text file myText.txt or whatever you like and copy and paste the following text in it

&monthNames=January,February,March,April,May,June,July,August,September,October,November,December &dayNames=Sunday,Monday,Tuesday,Wednesday,Thursday,Friday,Saturday

"&monthNames" and "&dayNames" are the labels which will help us to acess a part of the data. You can name
them in any way you like such as "&part", "&xxx" or "&whatEverILike". All the parts you would like to access
should have a different label.

Now create a file loadText.fla and save it in the SAME FOLDER as the text file.Create a second layer and name
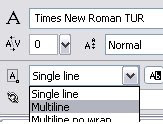
it "Action". Select the first layer and click on the Text Tool and go to properties panel and set the Text Type
as Dynamic Text and select the Line Type as Multiline then create three text fields.


Select each one at a time and give their instance name in the
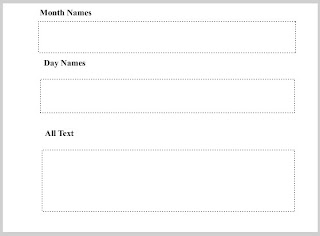
Properties Panel as monthnames_txt, daynames_txt and alltext_txt respectively. Create small Satitc Text boxes on top
of each previous text boxes and create labels. At the end of these steps your stage should look somewhat like this.

That done right click on the first frame of the Action layer and select Actions
In the window that opens copy and paste the following script. I think it's sufficiently documented.


//declare two objects of the LoadVars class to load the text file
var text_lv:LoadVars = new LoadVars();
var text1_lv:LoadVars = new LoadVars();

text_lv.load("myText.txt");//load file to display in parts
text1_lv.load("myText.txt");//load file to display the whole text

//display the text in parts
text_lv.onLoad = function (success:Boolean)
{
if (success)
{
monthnames_txt.text =text_lv.monthNames;//show text labelled as "&monthnames"
daynames_txt.text =text_lv.dayNames;//show text labelled as "&daynames"
}
else
{
monthnames_txt.text = " Cannot Open File ";//error message
}
}

//display the whole text
text1_lv.onData = function (myText:String)
{
alltext_txt.text = myText;
}


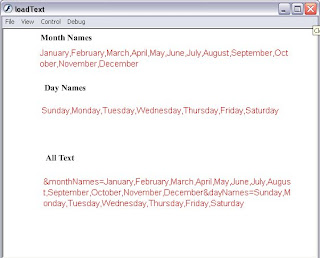
That's it! Hit Ctrl+Enter to test. If the text is not visible make sure the color of the text fields is not the
same as the background color, also check that you have saved the flash file and the text file in the same folder.
Wednesday, February 18, 2009

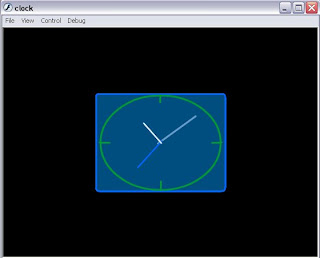
Flash Analog Clock Tutorials

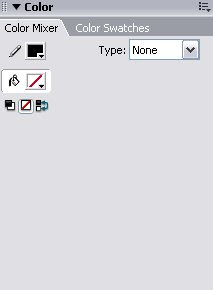
Open a new file and save it as clock.fla. Rename the first layer as bg and go to Windows -> Color Mixer and set it shown.

In the properties tag below choose the thickness as 3 as shown.


While pressing the Shift button draw a circle with width and height of 200 as shown


Go to “Window->Allign” and click on “Allign Horizontal Centre” and “Allign Vertical Centre”.  Make sure “To Stage ” is selected.

Click on the button encircled below to make 4 new layers and name them as actions, hour, min and sec. Your timeline shoul look like this.


Click on the first frame of the sec layer. Select the Line Tool and draw a vertical line of length 90. Select the line and hit F8 to save it as a symbol.  Set it as follows. Make sure you click the bottom centre registration.


Click OK and in the Properties tag set the name as sec_mc.

Go to “Window -> Library” and right click on sec_mc and click “Duplicate”. Name it as min_mc. Right click on min_mc and hit “Edit”. Select the line ad set its height in the properties tag as 75. Change the color.

Redo the above and name it as hour_mc with height 50 and a different color.

Click on the first frame of the min layer and drag min_mc on stage. Set the instance name as min_mc.

Click on the first frame of the hour layer and drag hour _mc on stage.  Set the instance name as hour _mc.  

Press Shift and select all three lines and in the Allign window click “Allign Bottom Edge ” and “Allign Horizontal Centre”. Drag all three to the centre of the circle drawn.

Right Click on the first frame of the actions layer and click “Actions”.

In the window that opens Copy and Paste the followin action script:-

var my_time:Date=new Date;

var hours, min, sec;

//get the present hour minute and second

hours=my_time.getHours();

sec=my_time.getSeconds();

min=my_time.getMinutes();


hours = hours + (min/60);

min=min*6 +(sec/60);

hours=hours*30;

sec=sec*6;

hour_mc._rotation = hours;

sec_mc._rotation = sec;

min_mc._rotation = min;


Right Click on the second frame of each Layer and click “Insert Frame”. Your final timeline should look like this :-

Done! Hit Ctrl+Enter to test what you have done. 


Use your Imagination to change the background to make the clock look stylish.